Article: How to Start Selling at Craft Fairs: A Beginner's Guide
How to Start Selling at Craft Fairs: A Beginner's Guide
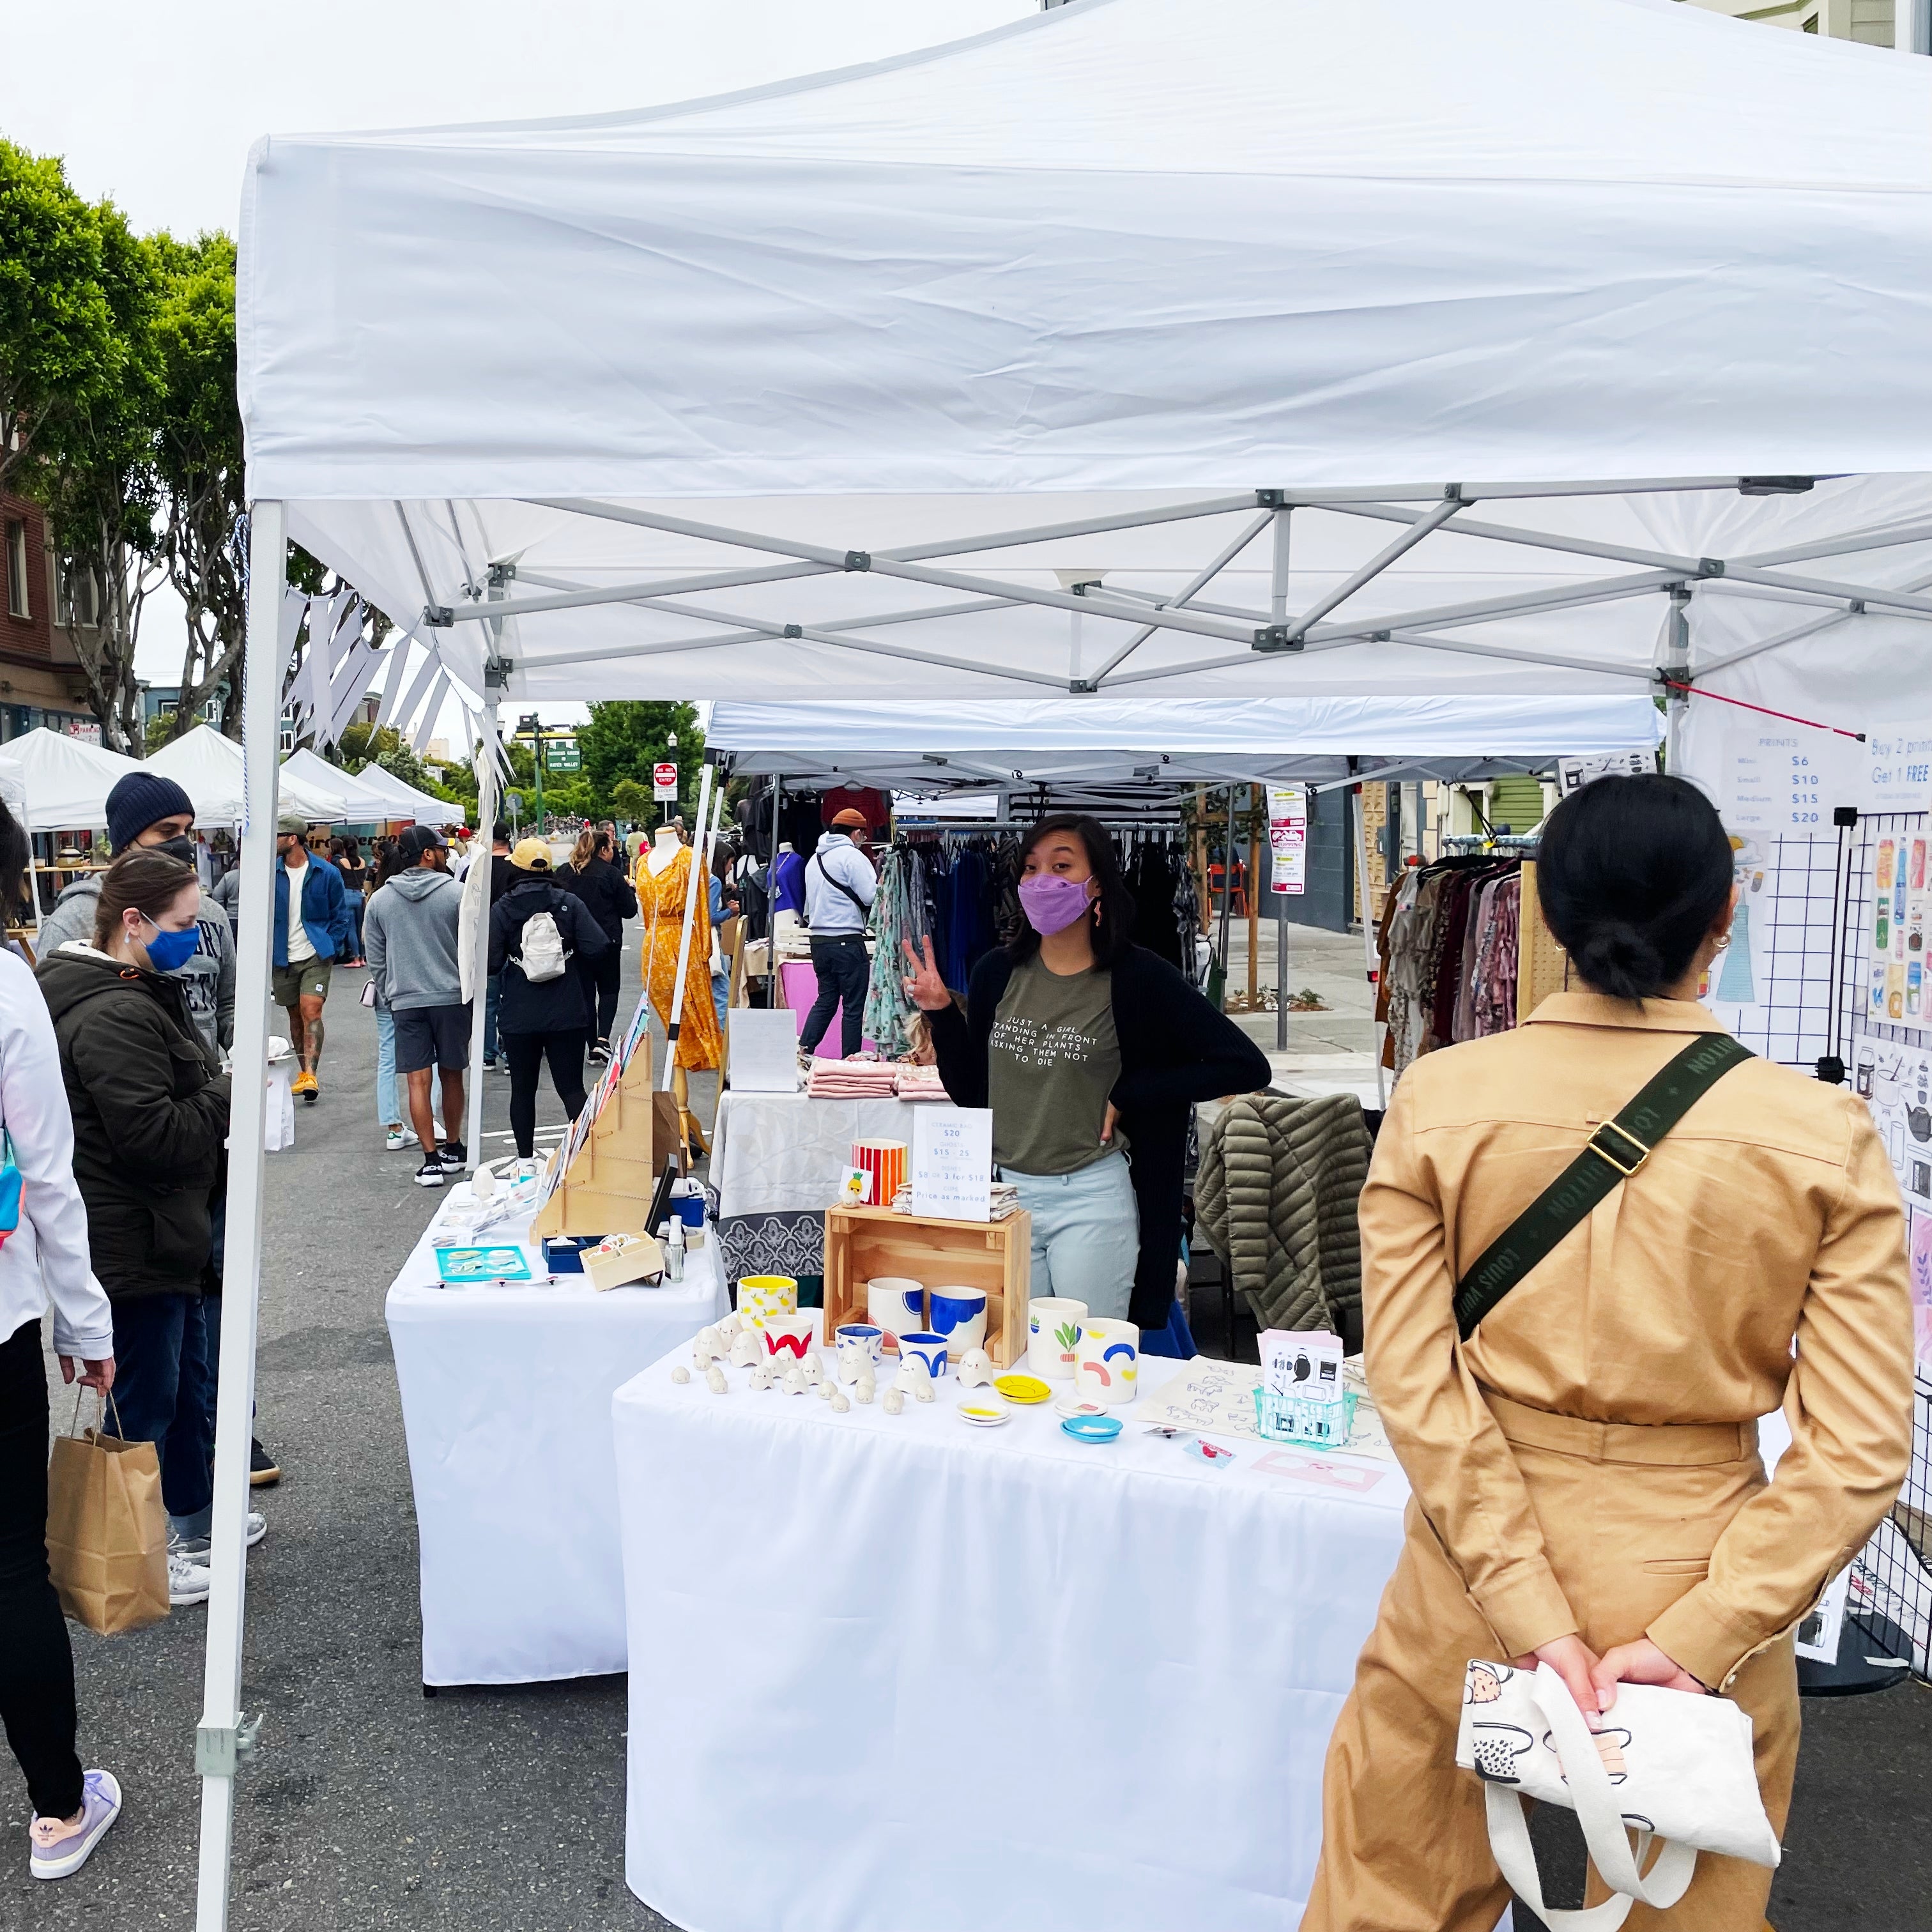
I have been selling my handmade goods at craft fairs in the San Francisco Bay Area for almost 5 years now and have come a long way since my debut craft show. Here are 4 pieces of advice to help you get started selling in person.
1. Just start!
If you’re waiting until you know you have a good product, you’ve found your target audience, and you’ve figured out the exact right pricing, don’t. Selling in person is the perfect way to test and figure out all those things. Unfortunately with the nature and saturation of the internet, you’ll never know if you’re not getting sales on Etsy or online because of your product, your price, the algorithm, or so many other factors. If you’re nervous, you can ask around to your friends or experienced makers you know for their advice to get a leg up, but there really is nothing like the real-time direct feedback you can get from observing customers see, touch, and respond to your products in real life.

Baby's first craft fair at Clayroom in 2018.
2. Research Potential Craft Fairs or Markets
When I started wanting to sell at craft fairs in 2018, I visited the ones that I knew about like West Coast Craft, Renegade Craft Fair, and Urban Air Market (now under Headwest Marketplace) here in San Francisco. I went as an observer to these craft fairs to see what kind of vendors that they accepted, what the vibe was, what the customers seemed like, and take notes. I talked to some vendors that were there to make connections with other makers, see how the event was going for them, ask how long they had been in business, etc. One of these shows is actually where I first met Sarah of SMO Ceramics when she was doing her first show!
There might also be an Etsy community group local to your area where people talk about all kinds of events that are going on from school PTA events to bigger craft fairs that you haven’t heard of. It can be a good resource to get to know other vendors and get tips on doing running your business too.
3. Choose the Right Equipment
Most craft fairs only provide the space and none of the equipment, so it is a bit of an investment to be able to have a set up to even sell in person. If you’re just starting out or you’re not sure if you want to be doing craft fairs for very long, I would recommend finding shows that are maybe smaller but provide a table for you. Some may even provide tents for larger booth spaces. Then all you need to do is bring your product and that significantly lowers the amount of money and stuff you need to start. You could also look into renting equipment or borrowing from a friend or fellow vendor a couple times to test it out. When I first started, I did the math knowing that I would want to do craft fairs at least 5 times, so it was more cost effective and simpler to just invest in my own tent and equipment.
The way you display your items, which is called merchandising, is really important to selling in person. It is how customers first see and interact with your items and can make a good impression. Of course various displays and all that can be an investment so when you’re starting out, you just need a way to make your items look nice and organized. Simple things like nice-looking boxes and minimal display stands for people to see your items clearly and maybe pick one up makes it look enticing and creates the air that you’re intentional about selling. And like I said before, you learn a lot about what does and doesn't work by just getting out there and trying it in front of real people.

I like to repurpose a lot of common objects like home storage solutions as they are much more affordable than professional merchandising displays. There’s a lot of reinventing that I do for my booth set ups to save money and space that I could probably make a whole other post about it. Take a look at other booths when you’re doing your research and see what they’re doing to display their items, especially if they sell things similar to yours. A lot of people will repurpose the same objects or have similar set ups so that’s a good way to start planning yours.

Here’s a short list of some equipment I use in my booth set up.
- 10’ Euromax Canopy Tent. You can also use an umbrella stand for shade in smaller spaces
- Foldable & Height Adjustable 4’ Tables
- Stool
- A collapsible wagon like this one is essential for hauling all your stuff to and from your booth spot
- Card display rack from Clear Displays
- Dish rack for displaying prints
- Crates for holding products or elevating displays
- Mini storage chest from IKEA. I would flip the drawers upside down and pull them out so they acted as tiered shelves for displaying items. I used it as storage at home.
- Collapsible Clothes Rack
4. Make Payments Easy
Without investing in any payment hardware you have two ways to collect payment: cash and payment apps. For most people, this means Venmo. You can even set up a Venmo business account where you’re able to type in the amount that people owe so that they can scan it immediately. There’s even a tip option that pops up for them which is nice. But of course this comes with some processing fees associated with using Venmo as a business platform. Some people use their personal accounts but supposedly Venmo is cracking down on covert business transactions being done in their platform, so I just prefer to do everything above board and on the books to avoid any future liability.
If you have an Etsy shop, Etsy and Square integrate where the Square app can sync with your Etsy data to populate all your products and also send back the information about your in-person sales. This allows you to count your craft fair sales into your overall Etsy sales records. I did this for the first couple years to boost my Etsy sales records and reputation as I was building my brand. Now that my shop is mainly based in Shopify, I use their hardware and app for in person transactions.
If you’re willing to invest in hardware, then you can get a card reader to accept credit and debit cards. Companies like Square and Shopify offer POS hardware that integrate with their applications. At this point in the way people pay in America, I would recommend getting a reader that accepts chip and tap payments. This allows for convenient payment on the customers end and secure transactions on your end. With the new iOS feature Tap to Pay, your phone itself may be able to accept contactless payments without additional hardware.
| PAYMENT METHOD | PROS | CONS |
| Cash | No processing fees | Carrying around/counting bills and change |
| Venmo/Cash App | Easy, quick transactions | Not everyone has it |
| Credit/Debit Card with Square or Shopify card reader | Most people have credit cards |
Higher processing fees Hardware usually required |
These are just the main thoughts that I remember considering when I started doing craft fairs and what I do now to generally prep for a new one. There’s a lot more to cover so if you have any specific questions please let me know and I’ll be happy to answer them in a future blog post. If you're interested in more personalized 1:1 advice, I also offer Small Business Coaching Sessions!
Thanks for reading!
If you liked this post, you can support me by:
👩🏻🎨 Checking out my art on Instagram @maisonchanamon
🧋 Giving a tip on BuyMeACoffee
👩🏻💻 Visiting my website www.chanamon.com
💌 Sharing this post with your friends



4 comments
Looking to sell some of my cricut made items at a fair. Do I need a license?
Kayla
Having a craft raffle
Daja Hardway
This was really helpful for a school project! Thanks for all the help.
The only thing that I would do is add more information about yourself.
Maya B
What will i need to be able to reserve a table for the craft shows? I have never done one on my own.
Aurea Estrella Torres
Leave a comment
This site is protected by hCaptcha and the hCaptcha Privacy Policy and Terms of Service apply.